Thursday, September 28, 2023

Materials and Instructions of Rooster As A Whole.

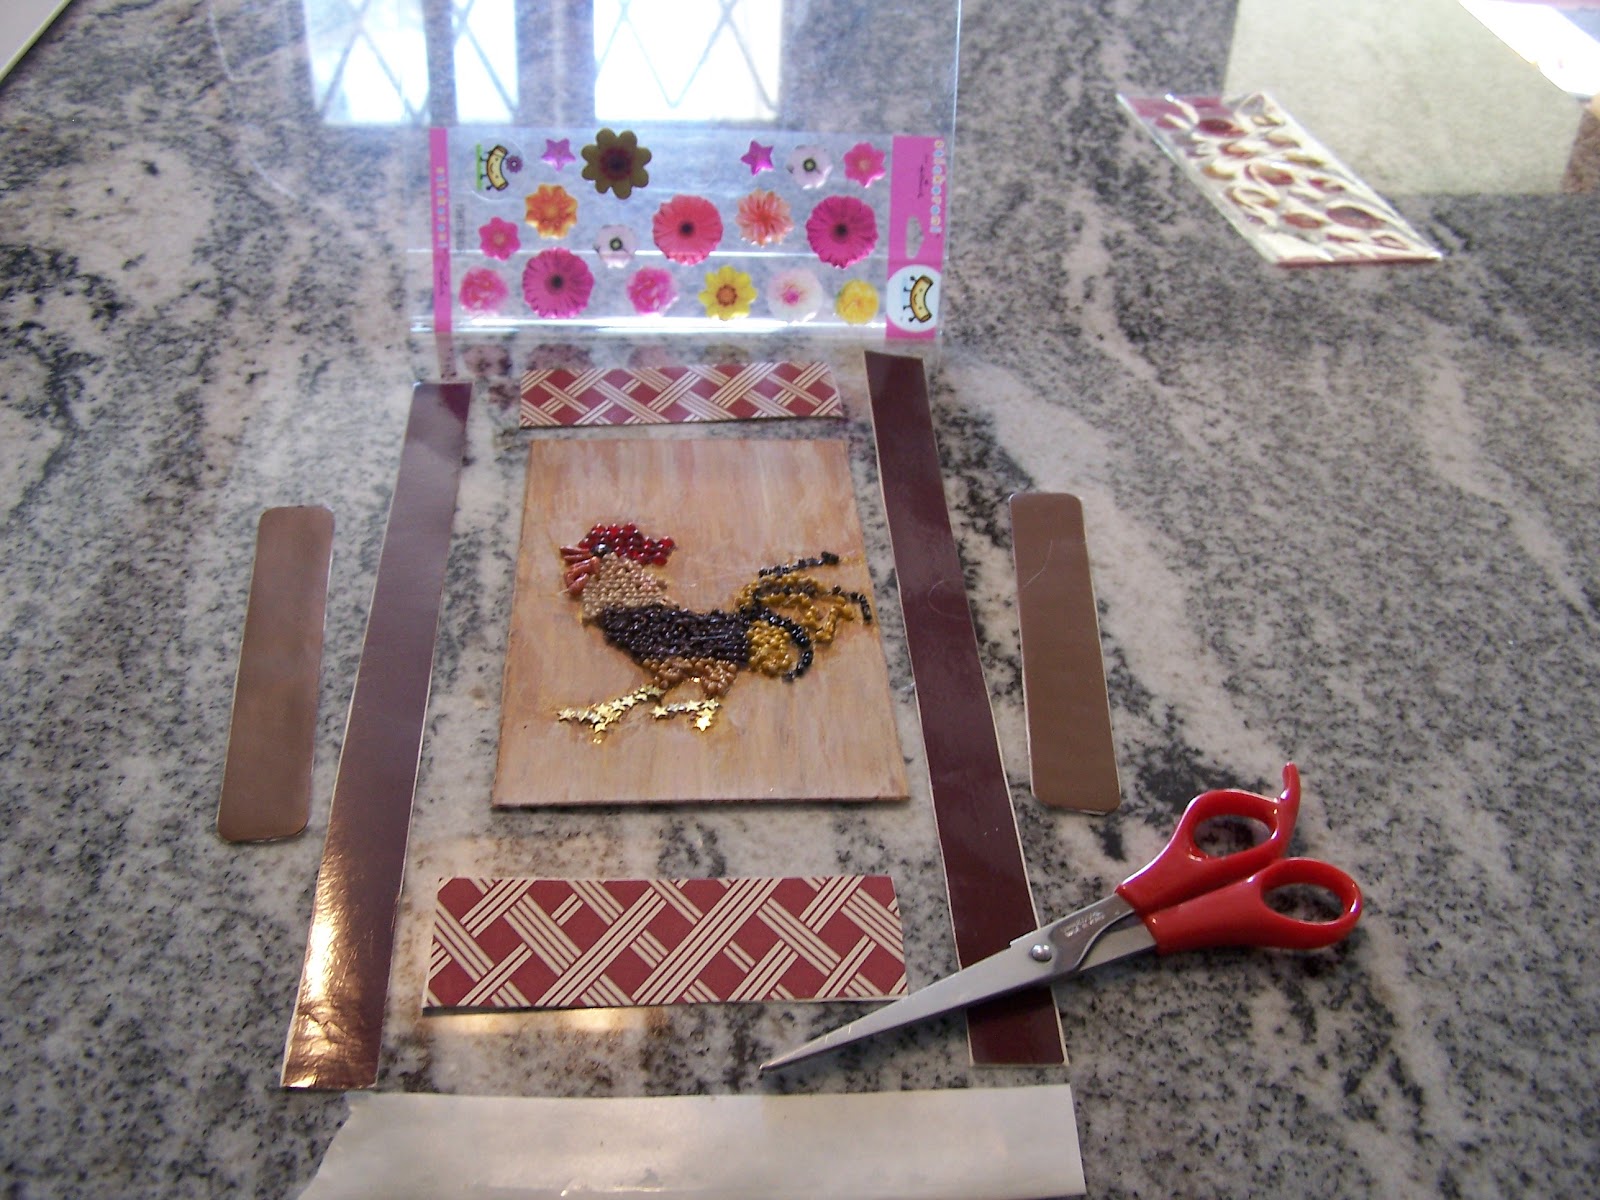
 Directions As A Whole

1. A Clear Frame.  The dimensions under picture instructions.

2. A rooster picture. Or whatever you choose.

3    colored pearls small- strong glue.

4. Alcohol Ink Markers. 

5. Star Sequins, bead for eye, I used a flat round black bead. etc. refer to picture for the rest.

6.Three sheets of double sticky.

7. A rectangular backing design, or paint technique.

8. A rectangular light cardboard backing, for your paint technique or design.

9. You will double sticky the back of your design and stick it on the front of the cardboard. Then take another sticky section and place it on the back of the cardboard. 

10. A rusty colored alcohol marker and a paintbrush and white paint over the rust color and quickly wipe off the paint with up and down strokes with a folded paper towel. If you are doing the paint technique When dried I sprayed it with Krylon Clear Spray. If you are choosing your own design you can still spray this also. 

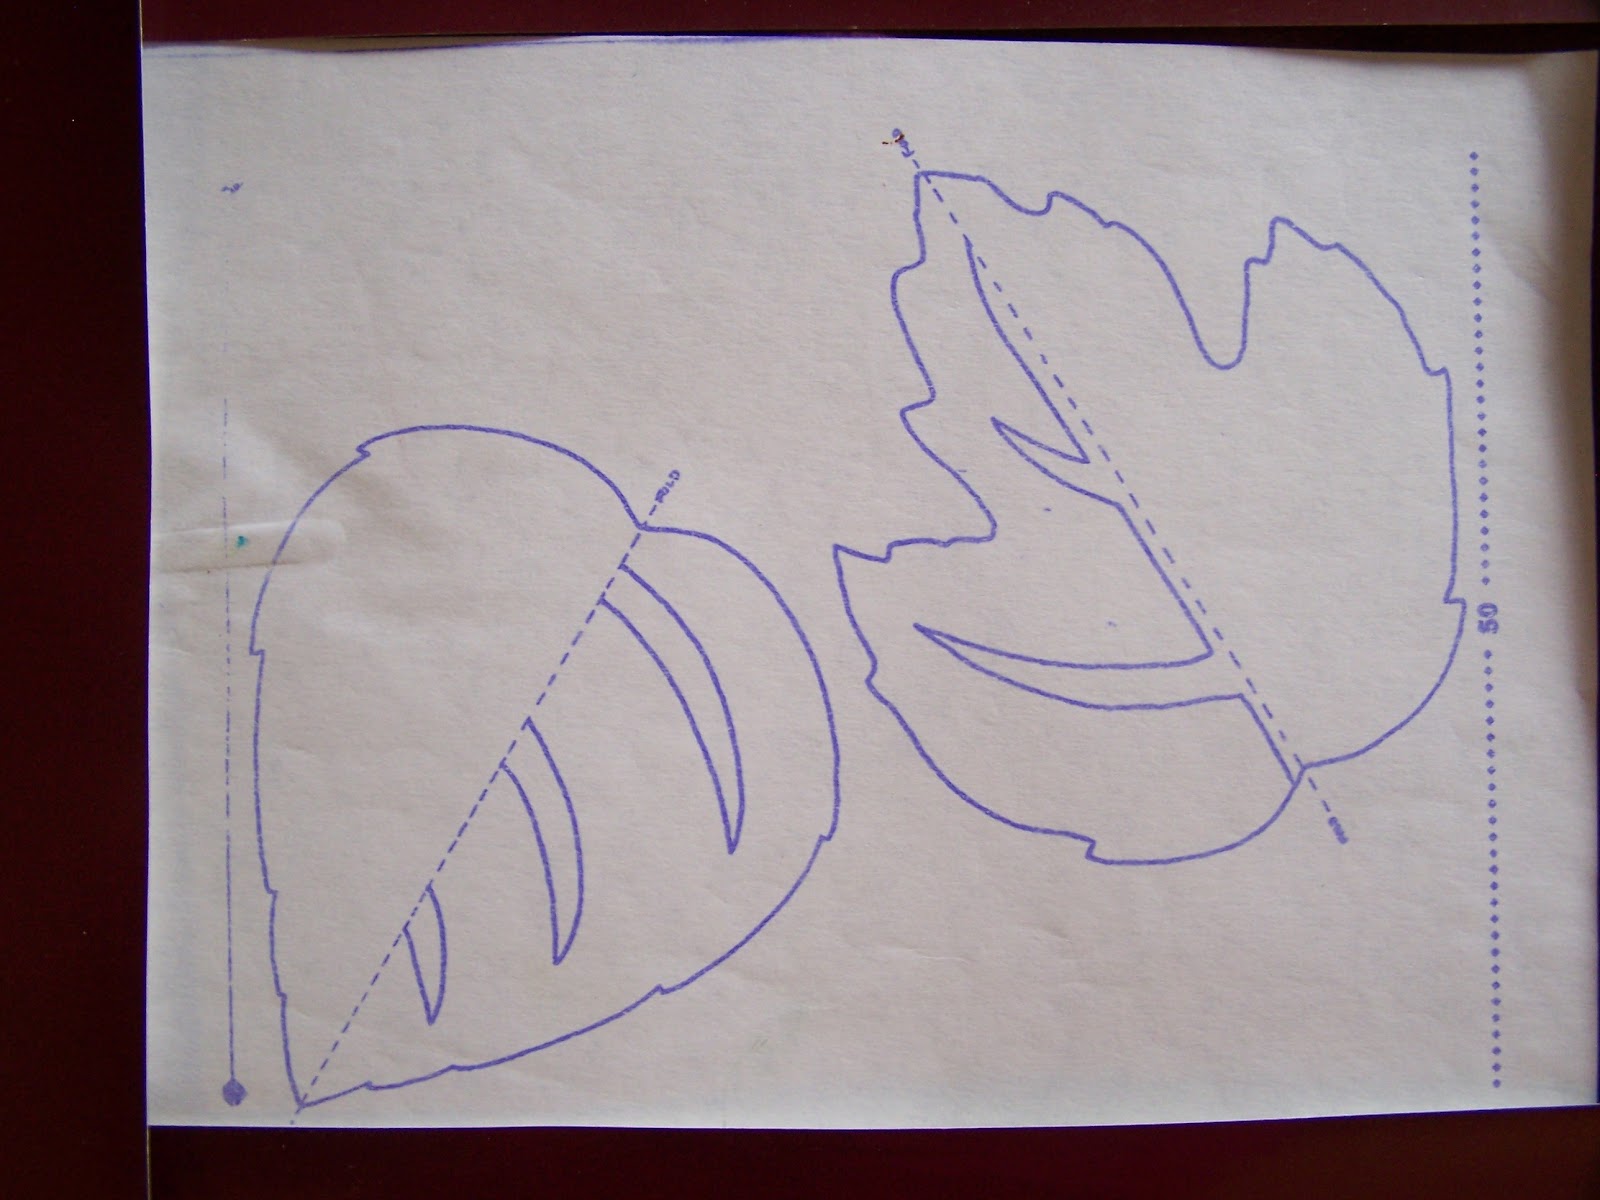
11. A piece of copier paper. Trace or draw the rooster on. Separate where you want your color to go by making lines to section off where the color begins and ends, Make your dots in a line throughout the whole thing to the end.  Color with your markers. Cut out a square or circle around your rooster. It does not have to be accurate or neat. We just want the white paper to still be around the rooster. You will cut the rooster out after making holes on the rooster. You will need a heated tool with a pointy point to it. After it is colored heat your tool and make the holes slowly and carefully. After that is finished you can back your rooster with double sticky cut it out now and peel then place on your rectangular piece.

13. Now you can glue your pearls on by placing a little glue in each hole and placing a pearl on. I used a strong jewelry glue.  Let dry overnight. 

14. When the pearls were dry I used nail polish over the whole rooster with the pearls and let it dry. Of course I put the other objects on before using the nail polish.

15.When dry I peeled the back of the rectangle part and pressed it carefully to the center of my acrylic frame. 

16. I decided next on my shapes and items to decorate all around my clear frame. I then backed them with double sticky, cut them out peeled them and placed them carefully and as even as I could to and around my clear frame.  

Remember when doing project to read all instructions. Look back on pictures, and read under them as well.  Everyone learns differently, some visual, some are independent of reading instructions, other's want both pics and instructions. Some need to read it more than once, etc. No matter your style I hope I gave enough cues and pictures along with plusses and minuses for you if you have never tried doing this what imagination and thought process that can go into one project. Hopefully not too overwhelming, but clear enough for each to be able to comprehend.  Thank you for visiting.  


Tuesday, September 26, 2023

Completed Rooster And Decor Framed.

                                                    Hello everyone. Here is the finalized piece.  After playing around to decide on how I should place things. I made a couple changes. I will explain the reasons. I mentioned I was going to put 4 puffy type clear sticker's on. When I had my frame down and tried the sticker's on the frame I liked the way it looked. But when I had it standing up and the light showing through the frame. You could not tell they were flowers, because of the solid strip I put on each side interfered with showing the flower as a whole. So instead I used 4 pressed waxed design seals. I had bought these but they were all different in color. I liked the different flower on each, but I changed the colors to match as a whole. I used 3 colors that I painted on the waxed seals. First on I painted in silver. Next, I used a golden sunflower yellow color and slightly brushed it on. After that dried I used a copper color on top in different places not needing to get in the lines of the design so all colors have a space to show color in different areas. In other words all colors were able to be seen in the seal. When there are indentions in an object, you can use this as an advantage to get that kind of effect just by brushing your brush slowly and lightly across your piece But the first color the silver I painted this all, in the indentions first. Then slightly brushed the yellow and thirdly light swiped the copper where I wanted it to go. I used acrylic paint for them. On the brown side strips I put the rectangular pieces made of medal from a belt for I really liked how the shape and the colors went with this project as a whole. I used double sticky under each seal and placed them on the frame where I wanted them. When I did the buckle, part I used double sticky behind the medal piece and also on the strip where it was going to be attached. Before I attached this I used a glue gun to give it extra strength. I could use the glue gun because I first put the double sticky on, therefore it had the right consistency for it to be attached to. I cleaned the frame again before putting these items on. I would like to say that when at the beginning when I cleaned it the first time it had a sticky sticker and I at first was not able to get this all off. It was stubborn. Maybe there was a scratch on it. I had some  Tea Tree Oil. I tried that and it worked and no more sticky scratchiness on my piece. I also would like to say that my frame had not just one front and back, but two. I had to try and clean in between. It was hard to get in their because their was not a lot of space to get in between. So I noticed there was a section in between that showed a tiny white spot in between the plastic. I took a Q-tip it fit right in between and helped me clean those in between areas up. I extend these tips to you in case you might need them as well. This project is now finished. I hope in some way I was of some help.  Thank you all for checking in.  Take Care. :].
 

Friday, September 22, 2023

Rooster- Designing What And Where To Place My Pieces On My Rooster's Clear Frame.

                                               HI, I hope everyone's day or night is going well. I wanted to show you this part before I go on to the next section I am decorating on my rooster. I peeled the back of my shapes off after I decided where I wanted them to go. In other words I played around with it to see how I felt I wanted the shapes of design to go. Very carefully placed them on after I cleaned my clear frame.  Before I placed the rooster on I sprayed it to protect it more with Krylon Clear Glaze.  Even though I used clear nail polish I wanted to give it a stronger bond. I let it dry overnight. I am giving you this view of it because, people have different tastes and I am hoping this gives you permission to stop where you see fit. This is also good to show what you might do differently, for your taste someone else's taste, or, "sometimes you might have an idea to show something of space value that was not thought of you might want to consider, at times. After playing around with this, I am sure that this is how I want this to stay, for me. So far I found the easiest thing doing this project was the coloring. I enjoy coloring and I find it relaxing as well.  The hardest was positioning them on the frame to make it as even as I could.  For once you stick double sticky onto the clear plastic it becomes stubborn and a fight between you and them. I was in a war to win as best as I could. L.O.L.  I have a good excuse, for I am not a robot. ;). Let's go with that.   Okay, I don't want to forget to tell you what item I put on first. the center which is the rooster picture itself. The weaved design should go on next in case you want the rectangular strips to butt closer to the weave.  Then the longer brown strips and the shorter leather strips last.  Next, I will show you my finished project.  Have a wonderful day or night.  
 

Wednesday, September 20, 2023

Framing My Rooster.


                                                Hello again, Here we have a beautiful day. Sunny, slightly cool and a bright feel of a day.  Now that I am done with the weather, and I am put in a good frame. I will explain what materials will be used next.  For, I will be framing around a clear frame.  You can see the stickers on it just to show that it is their. I did not clean it yet just in case it would show up better for the moment. I have my rooster and I now peeled the backing off of the back of the rooster to stick to my backing. I did not spray my backing for I am not sure of what I am going to use yet. Though, I think it would be a good idea to do this before fastening the rooster etc. I did use clear nail polish on the rooster after it was dried, finished and cleaned up. The brown strips you see in this picture of 2 sizes, I backed with double sticky and cut around it. Also, the designed rectangular shapes, I did the same to. When I put this together I believe I will use 4 flower stickers to this frame.  The clear frame size that I used is about 10 and one third by 8 inches. Next time I will put these pieces all together on my frame.  I hope this is putting the right frame on your mind in whatever you are doing in your days and nights.  Take Care.  Z^)

Tuesday, September 19, 2023

Rooster Background - How To.


                                                  Good morning to all. It is 10:07 A.M, where I am. I know in this picture it is a wonder at all what it is.  This is the background that the rooster went on. For I will explain how I achieved this. First and foremost though if you cannot get a clear vision of this you can scroll down and you will see the background as a whole with the rooster picture with it. That will give you a better understanding of what this part is all about.  Another thing is you don't have to do this technique. You can have whatever background you choose for this step of course. I felt that I would explain this because that is what I did. This part of the background is about 7 inches by 4 and a half inches.  I first used a rusty colored ink marker on my background which was on a light plastic type of wallpaper. I colored the whole background with this. I then, used white acrylic paint and a flat soft paintbrush. I took  a little section at a time and then used a folded paper towel and wiped some of the paint off, with up and down strokes. So you can see both colors blending together. You do this to the whole background.  The reason I used the ink marker was one, to experiment and two because I did not have to wait for the paint to dry before painting over this. You have to do the wiping somewhat fast because you are not using paint over paint technique. The results were what I wanted it to be seeing it was a barn animal that I chose to do. It gave the barn affect that I was looking for.  More on the steps to take next, later. Have a pleasing day or night. :)  If checking the background out make sure it is the last rooster not the one with the white background. Go a little further and you will come to it.  

Monday, September 18, 2023

Why I Made Holes In Rooster- Making The Next Cut With Scissors.


                                                 Hello there, Hope everyone enjoyed their weekend.  Okay, I was going to explain what comes next.  Firstly, I could not find my rooster that I used. So no worries because I can explain on this one.  You have the picture of the rooster. Do not cut this out yet. You can see the square that is outlined in black that is what you will cut out on the outer black line.  You can make it a square or a circle. It does not have to be neat because later you will be cutting the outline of your image. In my case I will be cutting around my rooster(later.)  You should have the white color all around your image still.  Just in the shape of a circle or square.  Now you will need to take your double sticky and peel just the one side of it and take your image and slowly and carefully press it on the double sticky. I usually start at the top of my image and press slowly, or at the bottom. At any rate of course do what is best for you. That is the reason for me making the holes. So it will help a bit more in securing my pearls on my image. Note that I also in the hole I put a dab of glue and the pearl on top of the glue. Again I used my jewelry glue for I find this has been a good glue for me to work with.  It is old and I had it for a long time. I am going to miss it when it is gone. For I cannot find the company who makes this anymore. So soon I will try again or have to research something hopefully close to that one.  Also, the holes leave an indention so the pearls can fit in the image better. The reason I wanted you to just cut around your image is because the next step is you are going to'' finally'' cut the outline of your image next.  You will find this easier because you waited to cut your image out fully.  If you cut your image out before then the scissors would stick to the stickiness of the tape and you would have to stop cutting every 2 seconds to get the excess glue off of your scissors.  This has happened to me more than once. So when doing something new it can be a wonder sometimes. Now, your image can be set aside. Next time I will talk about how I created the background for the rooster to be placed on top of. Take Care.  %)

Saturday, September 16, 2023

Rooster Project.- Colored, And How I Created Holes.


                                               I placed the rooster on a light background to hopefully see it clearer. Remember if you try this project do not have your drawing cut out yet. First thing I did after doing the drawing is made line separations to know where I wanted each section of color to go. Throughout the whole rooster, I made dots to line up in each row. I don't think I was too fussy in this part, but I will say that Try not to make them extremely close to each other. (For when you use the heat tool to make the holes you don't want it to make a blob because the heat gun touched the two dots at once.) Not to worry though because you can overlook one hole in order to do the other for I already ran into this situation and was solved just by overlooking one dot that was closest to another. I then took my ink markers and colored each section. I took my time and pretended each dot had a tiny square around it. That is how I colored it. You can do what is best for you. After I colored the whole rooster, I used the heating tool with the pointy tip on it. How I did this and you can be glad that you did not cut your item out because now you have more paper to hold onto and won't wrinkle your rooster. Knowing ,the excess of the white paper will be cut away after you finish making all the dots with the heated tool.  How I used the tool to make the holes is I lifted part of the excess paper and got comfortable how I was holding it to get at one hole at a time. Holding the paper with one hand and and the tool in the other and making sure I had easier access to where I wanted the next hole to come through. '' Taking my time'' slowly and carefully. It's funny, I started out making this project with the round pearls in mind, I have to say though I like this affect without the pearls as well. So to me that is a bonus because I can do just this very singular part alone on another project, for I like this just as well.  I am glad I was able to view the rooster both ways.  Simplifying can be just as nice. Next time I will talk about why I made the holes in the first place. Also, when it will be time to cut the rooster.  Using the heated tool and an extra paper make dots if I might suggest to have a practice feel for it might be an idea for you to decide on.   Please click on the rooster if you need a closer look. Getting tired of hearing this from me?  =p.

Tools And Items You Will Need For The Start Of Creating The Rooster.

                                                In this picture, as you see are markers. These are alcohol inks. I like to use these in some of my projects because if water ever for some reason spilled on the picture it would not muddle the picture. You can also use colored permanent markers. I have a heated tool with a pointy top at the tip of it. This will be used as well. I will explain in the next picture for you will be able to not only read it you will get a better idea and see why this was used. Scissors will be lastly used. In the picture above I explain.   Hope everyone is enjoying their weekend.  &+)
 

Friday, September 15, 2023

Pattern Of The Rooster.

                                         Here you are going to make your pattern. I know you see this cut out, but I would wait to do that. Just have it on your paper. You can make lines of design on inside though. So you know the color of each section you are going to choose. For paper, you can use a copier paper. I prefer the color to be white. I think it will show the colors how I would want them to be.  But suit yourself. Your project may have a different set of rules for your design. Happy Friday, Everyone.  =+)
 

Wednesday, September 13, 2023

Rooster Project.

                                                  More on this project this week.  Next day-  You will need for this project, a picture of your choice, small pearls, A bead for the eye, I used a flat backing bead. For the legs and feet I used star shaped sequins. A good glue for plastic or, and glass beads. Whatever you would choose to be used.  I used jewelry glue for mine.  A razor point heated tool, A sturdy paper backing to place your picture on. A rectangle size paper. I chose a wall paper a slight plastic coating.  I will explain what I did with this later. Along with other materials if you decide to choose what I did. The choice is with the eyes of the beholder. A sturdy thinner cardboard backing and double sticky sheets. One for the back of your picture of choice, another for the back of your rectangle shape and one for the front of your rectangle shape to attach which mine was wallpaper. As you can see with my rooster, that is how I connected the rooster to my wallpaper pattern background. So three sheets you will need and cut around it before connecting the picture to your backing.  These are the materials I used. I explained how I attached the contact paper. I did not attach my picture right away to the backing, I mostly today explained what is needed for this part of the project. For there is more to do before attaching the picture to the backing. If you do this just have the items gathered.  I hope my gatherings were not too confusing. More to come this week for a better understanding if needed etc. Have a great Thursday. :) 
 

Be Your Own Band.- With Picturesque Cards, Leading The Way.


                                                                How fun and silly this music making can be, whether with friends or , the whole family.  Add your own touch by making your own motion for other's to follow as well. :).

Tuesday, September 12, 2023

Have Your Children Create Fall Leaves For Your Windows.


                                                 The Children always enjoyed the results of making these colorful leaves and how the light shined through them when we put them on the windows. You will need, colored paper, scissors, basic glue and tissue paper. You can choose as many or as little colors for the colored paper and the tissue paper.  We used green, yellow, brown, red and orange colors for the leaf paper.  Have the children cut out the outside of the leaf. Next have them fold on the dotted lines and cut the inner part out that is for to show the colored tissue paper to show through. After they cut the middle part have them open the leaf.  It is probably best that you have the tissue paper cut into squares ahead of time. Make the squares about at least an inch larger than the colored leaf. So after they glue it they would be able to cut around the leaf after the glue dries.  So once the leaf is opened up you can put glue around the outer edges and place a piece of colored tissue paper on top of the first leaf. Then place glue around and on the tissue paper and place another leaf of the same shape on top of that.  So you should have two outer leaves. One in the front of the tissue paper and one on the back. After it dries cut the excess tissue paper away so you again can see it is a leaf.   (Please remember to read all instructions before doing this art project.)  Most of all have fun. =) 

Song: Lift Every Voice And Sing.


                                                                   Sing High, Sing Low, Listen And Hear So To Know. Feel It In Your Bones, Everyone Has A Tone. That Your Not Alone. For What Is In A Wonder, For Us To Discover ,If', We Cannot Wonder In the Face Of A Face In The First Place? For Is Wonder Just A Child's Play? Just As Long As We Know How Far To Take It, So Again, Not To Break It.     Have a melancholy kind of day or night.

Monday, September 11, 2023

Remembering 9-11.


                                                 Remembering 9-11 and the hope we all hold so dear.  My heart prays for all catastrophes no matter how near, no matter how far.  

Friday, September 8, 2023

Color Awards.


                                                                        Color Awards                                                                                                                                          Can be used with the color themes on this site, or, for your own curriculum.  Hope your day finds you well.

Thursday, September 7, 2023

Message - 9-7- 23 My Computer has been napping.

                                                                    Message                                                                                                                                         Sorry guys, Just wanted to let you know my computer was napping, or should I say asleep for days now. I do not know whether it is going to stay awake or not. Well, I felt I should inform anyone who has been joining in here.  While at the moment it is working I just wanted to also say thank you for checking in. I hope it understands if I need a nap. ;P   

Sunday, September 3, 2023

Swans Craft


                                                   With this art project it is basic and you might have all you need to make it.  Even in this craft you can see their grace.  You can use a glue gun if you don't want to use glue.  Of course with adult discretion. Only you can decide what is best. Hope you are all enjoying your weekend.

Saturday, September 2, 2023

Apple Pie Party Dip.


                                               I thought this dip brings it's own flair of a party dip. :)

Friday, September 1, 2023

An Egg full Appetizer. Ranch Deviled Eggs.


                                                    Hello again, Here is an appetizer that puts a twist on deviled eggs. My children really like ranch dressing. In fact one of them like it so much that they put it on most everything.  I don't enjoy ranch in a salad, but the family went out to eat one day and one of my adult children ordered a ranch baked macaroni. So, she asked if I wanted to try it. I was hesitant at first but then tried a bite. I was surprisingly surprised, that I really liked it.  Remember that commercial "Hey Mikey he likes it! He really really likes it.  Well that was me. L.O.L. If you live in another Country and never saw this commercial you can just skip by that part. It goes to show, to try things at least a first time before you decide whether your tastebuds like it or not. So if you think there is an ingredient you don't like and your thinking whether you should try it from another recipe maybe you too would be pleasantly surprised .  Maybe you too would be like Mikey.  My wish for you today would be I hope there is something in your day or night that makes you pleasantly surprised.